
Undeterred by my recent, rather lacklustre results from dressmaking, I embarked on another project – this time on a summer shift dress.
 I decided to attempt version C, as that will give me a versatile item to dress up for evening wear or dress down for work, and it also means I don’t have to attempt sleeves just yet! I thought my silk purchase from Walton’s would be perfect for this.
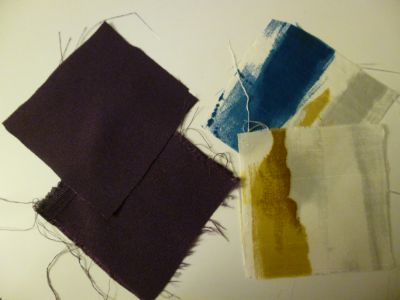
The dutiful textile student that I am, I remembered to cut a sample of the fabric for wash testing – I thought I would also test my other Walton’s purchased fabric at the same time. I cut 2 small, identical pieces of each fabric, and washed one of each on a 40 wash. Afterwards, I dried and pressed the washed squares and compared them to the originals. In the case of both the silk and the crepe-backed satin, the ‘before’ and ‘after’ squares were identical, so I knew the finished garments would be washable, and that I didn’t have to take fabric shrinkage into account. I carefully took my measurements, and realised that my shoulder-waistline measurement was approximately one inch longer than the pattern. I guessed that on a dress such as this, the difference wouldn’t be too obvious – however, this project is meant to be giving me opportunities to learn new dressmaking skills, so I decided to try lengthening the pattern. I cut the bodice pieces on the lengthening lines, and added spare pattern paper into the gaps, ensuring that I expanded both the back and front sections equally. This seemed a little daunting at first, but wasn’t so bad once I got started! I also decided to extend the overall length of the dress by a further 2 inches at the hem. I prepared my pattern pieces, and encountered my first challenge – how to match up the repeat of a pattern like this?!
 I was anxious to ensure that the central shape of the pattern was centered down the front of the dress, and that a relatively even coverage of colour would show at the neckline. This gave me a well-positioned front section on the fabric. I then concentrated on cutting the back sections of the dress so that the pattern also centred down the back of the dress. I also tried to ensure that similar colours matched up across the shoulders (from back to front), by moving the pattern further up or down for the back pieces.
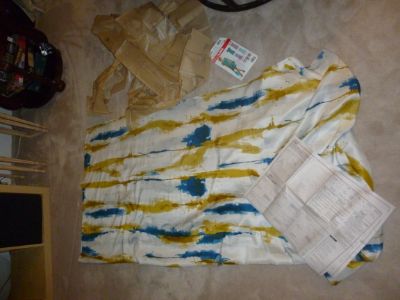
I followed the pattern closely, making sure I used the correct seam allowances (a chronic error in my dressmaking!). I found that the silk moved around a lot whilst sewing, leading to one piece either wrinkling up or stretching during the stitching process. I attempted to remedy this by stay-stitching around all the pieces before putting them together. I think this was somewhat effective, as it certainly prevented the flimsy material from warping and getting stretched. The collar and arm holes of the dress are finished by producing bias tape from diagonal strips of the fabric. I have made my own bias many times before, when making groovy ovengloves. However, this is the first time I had made it for clothing. I tried my best to cut a strip which would allow me to match the colours accurately at the neck line. Unfortunately, with so many variations in the pattern, I did not succeed in matching this perfectly at all!
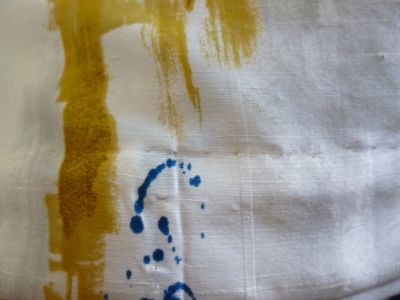
From watching episodes of the Sewing Bee, I have learned that the finish on the visible stitching of a garment can make all the difference to the overall finished appearance. Therefore, I was anxious to get the stitching as neat as possible. I used the hand wheel on the machine to stitch the bias, so that the stiches were as uniform as possible. I made endless mistakes whilst doing this – I must have unpicked it and re-basted it 5 times before I was happy with it! The first time, my stitching accidentally twisted one of the neckline pleats, making the whole bodice look lopsided. Unpicked and started again. Then, just after I started stitching, I realised that the thread had gotten all tangled up, right across the shoulder. Aaagh. Unpick and rebaste and stitch x2. This time, in a hurry to finish the damned thing, I basted the neck bias on back to front! How exasperating! All this repeated stitching, unpicking and restitching took its toll on such a delicate fabric. The bias began to lose its shape, and you can see in the picture below the faint needle points across the fabric, where the old stitches were. I am hoping these faint marks will disappear after the fabric is washed and steamed. Finally I finished the neckline, and then had a continuation of this problem whilst making sure the bias on both arm holes was even. In a few areas, the stitching missed the back edge of the bias, but I corrected this by hand sewing – I could not bear removing the bias for the Nth time! 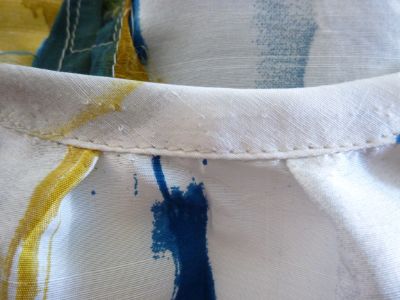
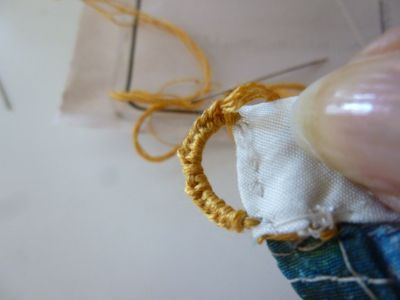
The next thing the pattern called for was a button loop. I’ve never made one of these before by this method (basically blanket stitches over a few loops of thread). This was relatively straightforward, and I found some embroidery thread which matched the colours in the fabric.
Finally, all I needed to do was hem the garment. I have done invisible hems before, but with the silk being so delicate, I took extra care with the hemming. I’m really pleased with my handstitching here! Can you see the hem? Ok, so you can, but I’m happy with it :-)
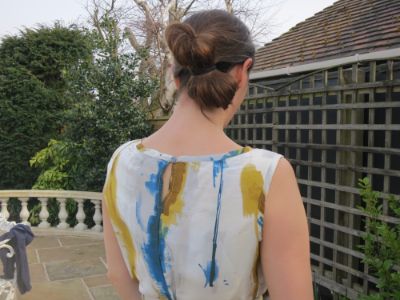
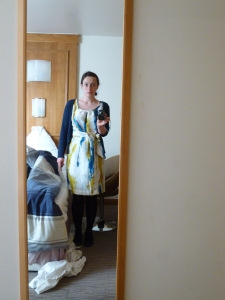
I finished the dress a few days before I was due to work at a Conference, where I knew that one of the delegates from my Union was an enthusiastic dressmaker. This gave me a perfect opportunity to try my dress out for the first time! It was really comfortable and light to wear all day, and I got lots of compliments on it! My dressmaking friend commented that I had matched the pattern up well around the garment, which I was so pleased about that I took a sneaky selfie in the hotel mirror – excuse the deshevelled room!
I’m pleased with the finished result and I know I’m going to get a lot of wear out of this dress – it’s not perfect but I’m happy that I perservered with the fiddly bits like the bias neckline, the invisible hem and the pattern matching, as they really improve the end product :)


