
Right, I actually completed this at the end of the Summer and have been meaning to write it up – I finally got round to completing the third section of my aquatic tetraptych, this one produced in the medium of crochet!
On a recent visit to see Mummymau in Hampshire, we visited a yarn shop in Alton called The Knitting Habit, which stocked a fabulous range of Drops Design yarns – I couldn’t resist! In particular, these cotton viscose yarns in pearly pastel shades caught my eye, and I couldn’t wait to get started on a new project. I’m sad to report that, since September, The Knitting Habit has closed! I will keep you updated if it reopens.
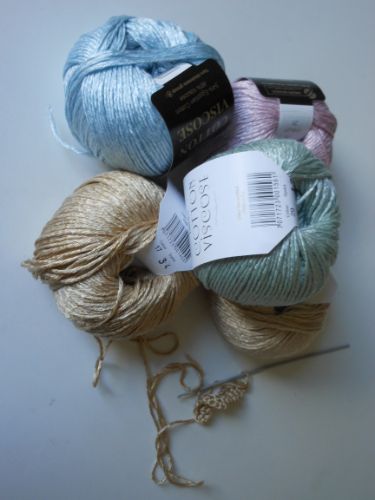
I had an idea to experiment with crochet snowflakes as Christmas decorations, and I found this fantastic tutorial on the Attic 24 blog. The lovely pearly yarns lent themselves well to the design, as each of the stitches almost shimmered!


I completed 17 snowflakes in a variety of colours, ranging from greys and silvers to golds and greens. I liked the idea of trying to use them to make a geometric, tessellating pattern, so I laid them out in a number of different permutations until I was happy with it.
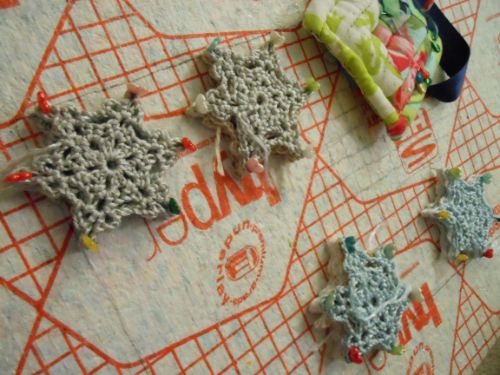
The shapes needed some stretching before I could go any further, so I pinned them out on a spare piece of carpet underlay (which comes in mightily handy for tasks like this!). The easiest way to do this was to pin 2 or 3 snowflakes, stacked on top of each other, with 6 long pins. I ended up with 5 or 6 small piles of flakes, each pinned to equal sizes. Using carpet underlay comes with an added bonus at this point, as the underlay I was using was printed with a grid on the surface, so it was simple to ensure the flakes were stretched to the same size.
Once they were pinned, I lightly sprayed them with a home-concocted starch spray of 1 cup hot water and 1/2 tbsp cornflour. I waited patiently (ok, not that patiently) for them to dry, and then set about attaching the snowflakes together. 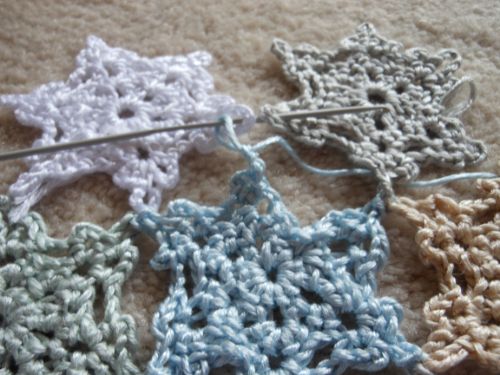
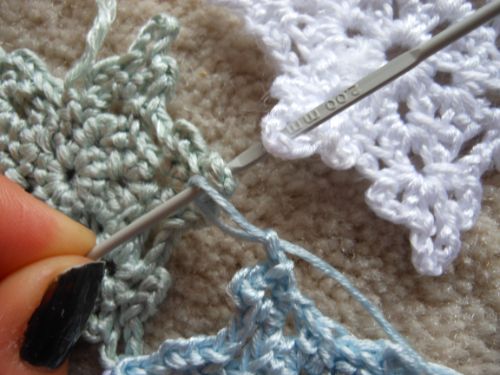
Rather than stitching them together with thread, I decided to unravel the final row of stitches on a number of the shapes, so that I could crochet them together. I ended up having to frequently refer back to photos of the correct design, and number the shapes so that I could remember which ones to unravel, and what order to hook them back together in. This was a bit time consuming, but I’m glad I did it as it has resulted in a much cleaner finish.
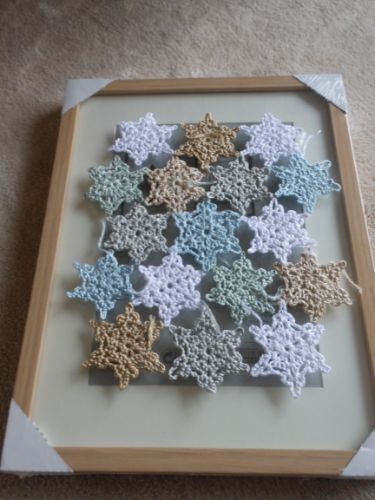
Now that the shapes were all joined, I pinned and starched the entire piece of material again, to even out the shapes. It was all coming together rather nicely! Once dry, I mounted it onto navy blue felt using a simple running stitch.


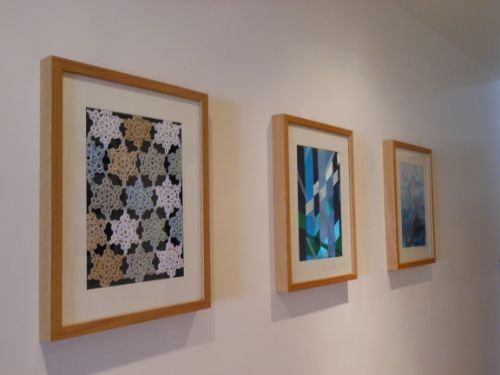
So, here is the finished article – a third water-themed work for the wall. I have absolutely no idea what to do for the final one, but if anyone out there has some ideas, please let me know!

6 replies on “Crochet Snowflakes – my third water work!”
This is such a great idea. Thanks for sharing! I love the finished project. I’ve been looking for a piece of space to fill in my craft room and this might just do it.
LikeLike
You have put a lot of hard work into this and it looks really at home in it’s frame. Well done.
LikeLike
Thanks! I’m super-pleased with it!
LikeLike
[…] viscose by Drops Design every 16 lines. I’ve got quite a lot of this left over from the crochet snowflakes project, and I am totally in love with all of the colours. This was a simple, effective way of bringing out […]
LikeLike
I am just trying to teach myself to crochet and have a little bundle of circles. I feel inspired by these lovely snowflakes and your scarf- I will crack on keeping going!
LikeLike
Good luck, stick with it!
LikeLike